Struggling with Mig Welding...

56_Kruiser

New member
I have a Linde 160 Mig welder, and a new TPlus15 torch. I'm not an experienced welder. I have always had this problem:


I have the wire stop pushing through the torch, and then wadding up at the roller that pulls the wire. One thing that happend once while threading: I manually pushed the wire through, and it ultimately got stuck and I couldn't push it through. Pulled it out, cut it off, and threaded successfully.


So, I'm trying to spot weld, two pieces of .022 together. Definitely need to practice. But I can barely get a tack, and then it piles up in the welder again. The chart on the welder says to set the heat at 1, the lowest setting. NOt sure about speed. If I get it too slow, the wire burns up and sticks to the tip.


What would you suggest is my problem, the first thing to try?
 

chopolds

Member
You have to get the settings right to do anything. Are you using a mask and watching the weld process? If so, you might be able to see if the wire is burning too close to the tip or not.
Usually you set the wire speed and heat to the same number, on a lot of machines. It's a start. Run a short bead and see if the bead is relatively low, and you can see some melt on the opposite side. If not, turn the heat up one notch, and bump up the speed one also. I go by sound...it should sound like sizzling bacon. Seriously!
If it pushes your hand away pretty hard, your heat is too low or wire too fast. If it burns in the tip, add more speed. If the bead is high and no penetration, more heat. You have to play around with it a while to get it right for the sheet metal thickness you are welding.
Also...be sure you have a GOOD ground. Bare metal, relatively close to the weld area. A bad ground, say.. on rusty or painted metal, will also cause 'bird nesting" as the wire won't melt, so it bunches up.
Some cheaper, or smaller machines dont' have enough settings to get it perfect, so you have to compromise. It seems the right speed or heat always needs to be in between the numbers on the machine!
 

56_Kruiser

New member
You have to get the settings right to do anything. Are you using a mask and watching the weld process? If so, you might be able to see if the wire is burning too close to the tip or not.

I am using an auto dimming mask. The weld isn't going long enough, frankly, to tell. Welding on this thin steel, to get practice before I start on the hood scoop and other repairs. I ran it a little longer, and burnt through.

Usually you set the wire speed and heat to the same number, on a lot of machines. It's a start. Run a short bead and see if the bead is relatively low, and you can see some melt on the opposite side. If not, turn the heat up one notch, and bump up the speed one also. I go by sound...it should sound like sizzling bacon. Seriously!

Thanks for that tip. I think I have the speed set faster. Maybe it's jamming into the metal, stopping and then nesting. Maybe one of the things I first need to do is try the beads like you say on a think piece of metal, just to see if I can get a weld going. Practicing on trying to butt weld two .022 pieces of body metal together might be easier if I can first master getting the settings right.


If it pushes your hand away pretty hard, your heat is too low or wire too fast. If it burns in the tip, add more speed. If the bead is high and no penetration, more heat. You have to play around with it a while to get it right for the sheet metal thickness you are welding.

Appreciate it. I'll be spending quite a bit of time tomorrow trying, with thicker metal first.

Also...be sure you have a GOOD ground. Bare metal, relatively close to the weld area. A bad ground, say.. on rusty or painted metal, will also cause 'bird nesting" as the wire won't melt, so it bunches up.

I'll sand the metal to shiny for the ground (It's not painted, but it is coated with something). Maybe that will help.

Some cheaper, or smaller machines dont' have enough settings to get it perfect, so you have to compromise. It seems the right speed or heat always needs to be in between the numbers on the machine!

This machine has notch settings for heat, but the speed is a dial.

Thanks for the input. I'll post back after I attempt some of this tomorrow.

Oh, BTW...I've been Googling, and it seems the most often 'successful' suggestion is to lighten the roller pressure so that if the wire hits something to stick, it slips at the roller.

I've attempted that, but not with focus. I find it slips more than feeds, and I end up cranking down the pressure on the wire. Maybe I just need to really give it a go with this in mind, until I find the right pressure on the wire. Something else to experiment with.


It sure is frustrating.
 

chopolds

Member
Lighter pressure on the rollers is a good idea, but a lot of times, due to the crazy positions we get into to weld, the wire can also get hung up in the liner...technically you should have the cable as straight as possible, so the wire flows freely through it. If it has too much of a bend, it will cause the wire to bind up in the cable, again either slowing the wire speed down too much for a good weld, or bird nesting the wire.
 

56_Kruiser

New member
Ok. Been testing just a bit. I still need to set the roller lighter, still nesting.

I think I'm having problems with settings. I have the heat set lowest; I started with speed of 1 and have gone up to 2 1/2. The wire is melting away. Makes me think I need to go faster.

But, another question is how close should the tip be to the item being welded? I think I heard 1/4", But at that close it definitely is melting away, and, I can hardly see the welding.

Another thing I have heard, is to lower heat, go more at an angle. I'm going to go back out and try that, and play with speeds more. Right now just trying to be able to do a continuous bead on a heavier piece of metal, stop, and start again, w/o nesting.

I'll post back how it's going. If you see this and have more comments, I'll be back to see them soon.

Thanks
 

56_Kruiser

New member
Head Bang. Brain Fart!

I just realized I was reading the heat setting wrong. I kept thinking "This is soooo hot". Well, I had it dialed all the way up instead of down. Back to more experimentation. I'm more optimistic now.

[EDIT]
Doing much better. Now need to get a hang of doing the right types of tack welds.
 
Last edited:

56_Kruiser

New member
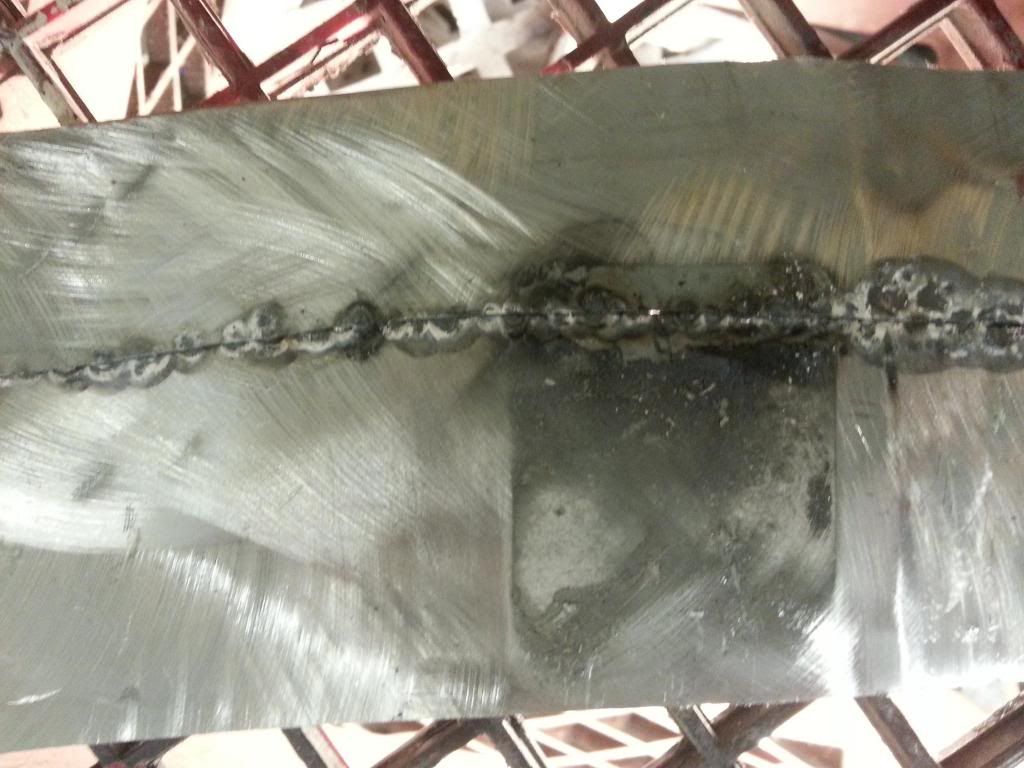
Ok. So, I was able to do a series of spot welds. Based on that article which I believe I referenced in the other thread, it is best to be patient, and do a lot of spot welds, moving around, to help reduce warpage. So that is what I'm trying to learn, and practice.

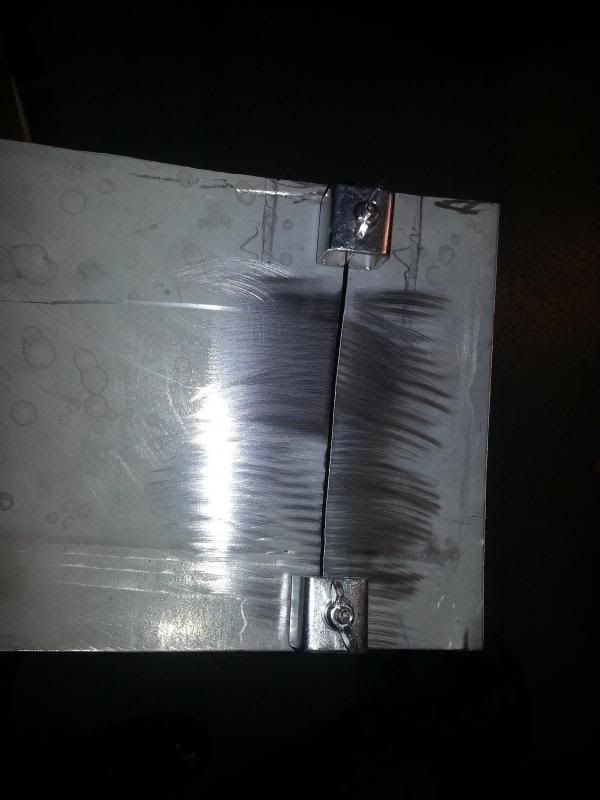
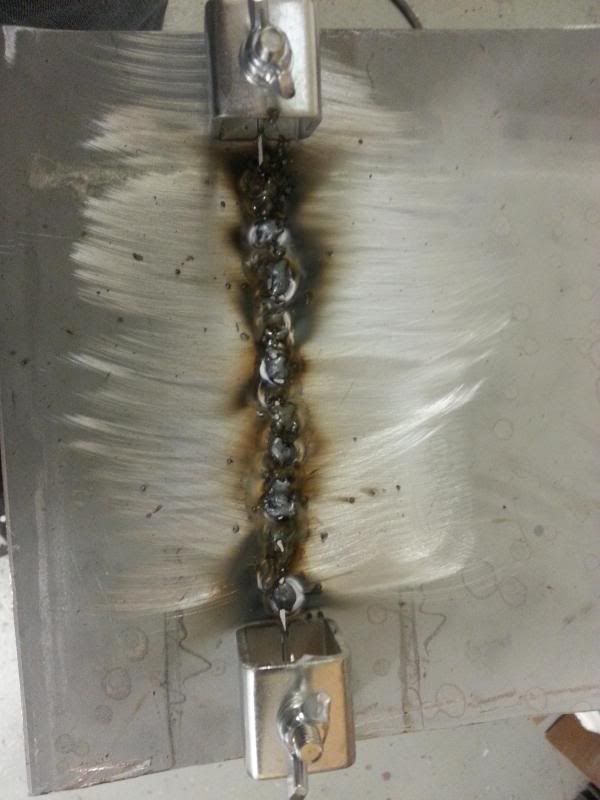
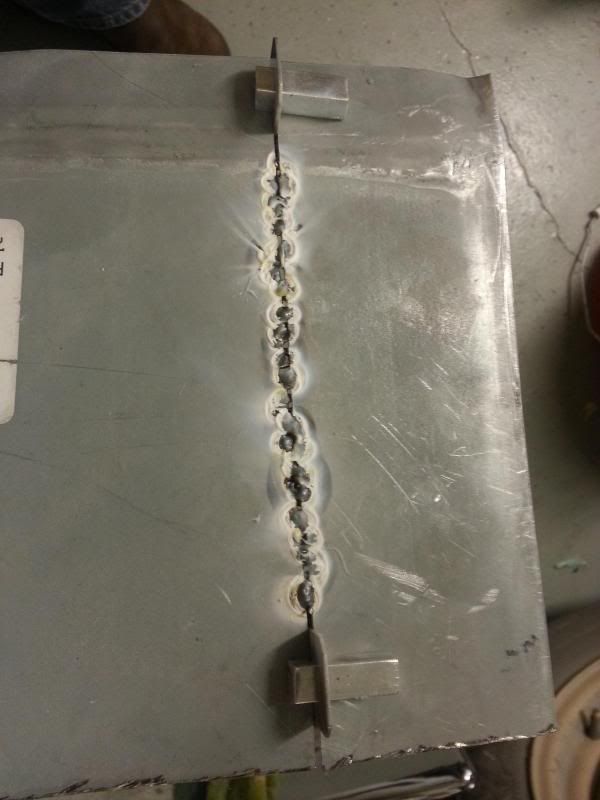
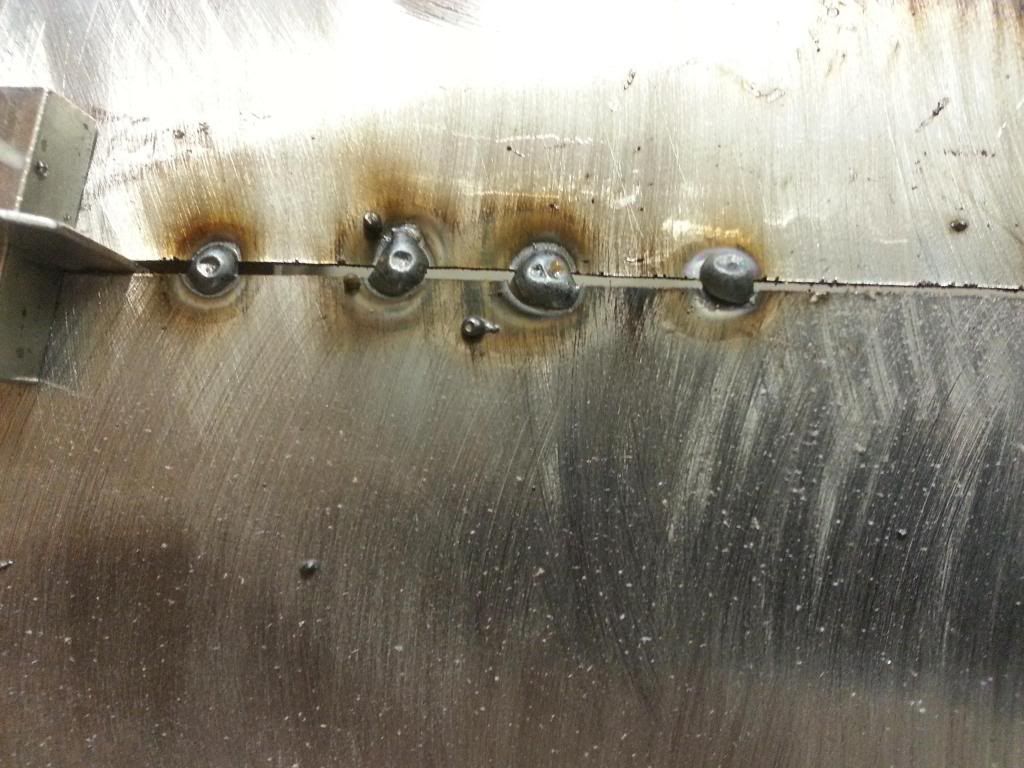
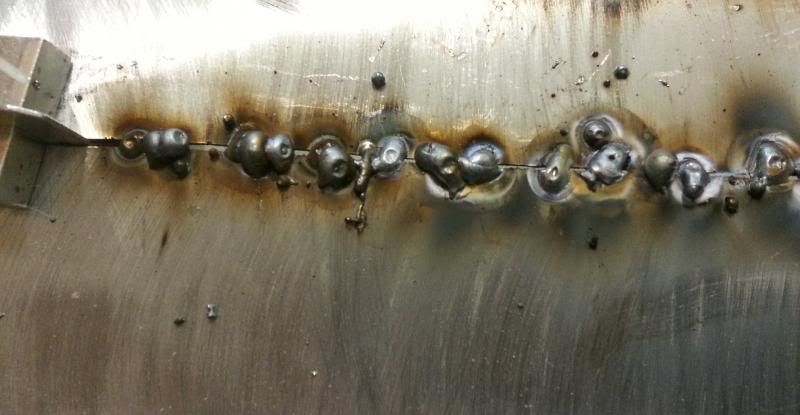
First picture is what I was welding. I did it with the clamps, which holds it a bit apart, for now so I can learn filling gaps. Second picture is my first (ugly) pass at multiple spot welds. I haven't really even closed all the holes on it. But thought I'd post in case it sheds any light on tips. Oh, and just added a third picture, of the back side. I just realized I did not brighten up the metal on the back side. I'll do that on my next pass, and take more time on the welds too. I was excited with my success over the birds, and went pretty fast.

But Feeling good that at least I may be mostly past the bird nests.


Attachments

  • IMG_20140129_125824_zps9cc3c8f2.jpg
    IMG_20140129_125824_zps9cc3c8f2.jpg
    23.8 KB · Views: 2
  • IMG_20140129_130718_zpsc7735f06.jpg
    IMG_20140129_130718_zpsc7735f06.jpg
    28.8 KB · Views: 2
Last edited:

56_Kruiser

New member
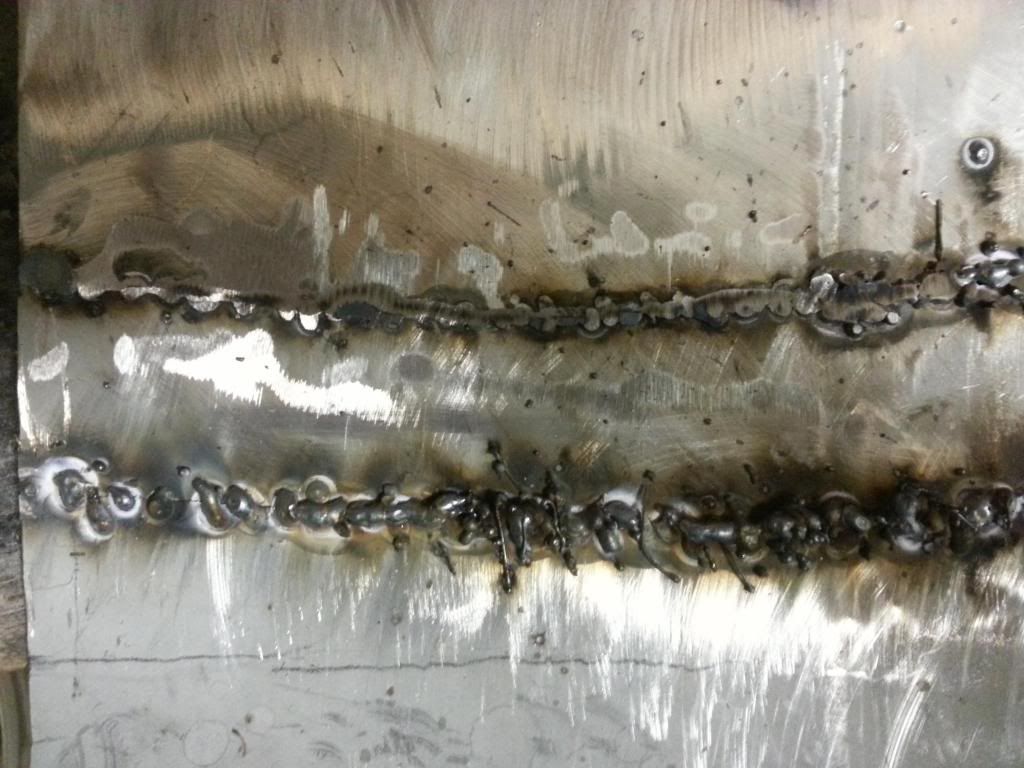
Probably my final post for today. Here is my latest attempt at spot welds.


The earlier pics were at heat 2. It seemed maybe too much weld built up.

I turned it all the way down to 1, and am experimenting with wire speed. (BTW..I'm getting bacon sizzling...albeit with intermittent pops). I'm finding the more spots I add, the uglier it gets. This picture is the first 4 spots, and I think it looks pretty good:


This one is after a few more:


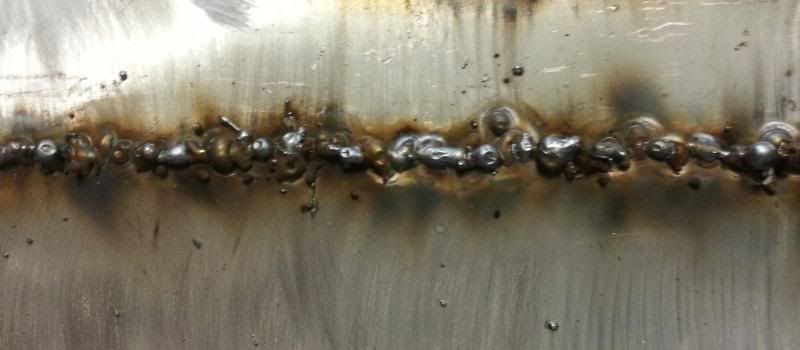
And finally at the ugly stage. It seems like as weld builds up, the metal then is less clean, and contact is not as good, and the weld get's more difficult:


This is the under side. I'm wondering if it looks like there is enough penetration:


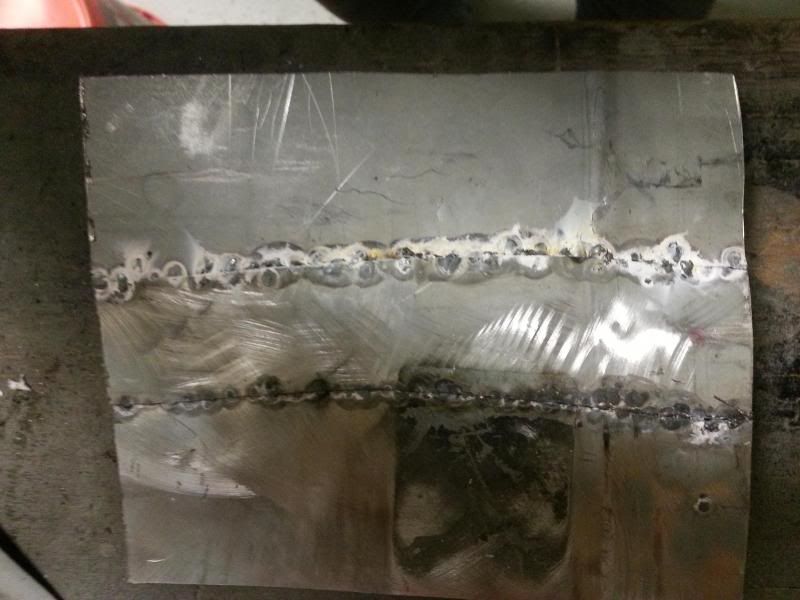
I decided to do another shot with heat at 2. The bottom weld of the picture below is the heat 2, and it's looking better than my earlier at heat of 2. Still starts getting pretty ugly as I pile lup the tacks. The top one is the Heat at 1, ground off some.


And the final picture, from underneath. Heat 1 on bottom, and Heat at 2 on top. Looks like better penetration. I'm not having blow through. So that's one thing good.


So to summarize, at this point, my main need now is to get my tack welding correct. I am not blowing through. Need to get better at not building it up so much. I seem to be doing fine for individual tack welds, but as I do more and get them closer together, the weld/arc seems more difficult to start (similar to trying to weld on non-clean metal), and it starts getting pretty ugly. I really don't 'care' about uglym, as I will be grinding it down, but then I want it to be an effective weld.

It seems like it's going to take 4 weeks to weld in that scoop, given I plan to tack it, and give cooling time, and also hammer/dolly the welds. On that, Want me to do that while they are hot?

Later for now.
 
Last edited:

chopolds

Member
You're getting better all the time. Keep practicing.
One thing to watch is that when you are doing tack welds, if you are building one on top of another, the weld goes towards the closest thing that is electrically conductive. That is usually the TOP of the last tack weld. So you wont' get good penetration after your first set.
Most welders stitch weld in between tacks, but you can just build tack on top of tack. But after you get yor piece first tacked together, with tacks aobut 1/2 to 3/4" apart, grind off the tops of the tacks, so that the next one in line hits the sheet metal, not the weld bead.
I find if I have a delicate part to weld, after tacking it all together, grinding off the tops, if I run a series of tacks in between the existing ones, do it one right after another, just barely enough time for the weld to cool just a bit, I get good penetration. And since the wire is drawn into the still hot seam, I dont' get a high weld bead, and I dont' have to keep grinding every set of tacks down to weld in between them.
Try it...takes a while to get the timing of it correct, but it's a good technique for thinned metal, filling holes, and more.
 

chopolds

Member
Not sure, but the reason your new tack might not start so easily, is there might be some kind of contamination on the metal...oil, galvanize, paint, rust or oil/grease from the opposite side. OR is your welds aren't laying down nicely, and you are gtting a "ball" on the end of your wire, it is the ball ( sometimes filled with contamination) that is preventing good initial melting....a thick ball needs more heat to melt!
If you see too large a ball on the end of your wire, try to figure out what's wrong..and clip it off before starting your next weld.
 

56_Kruiser

New member
FYI..I am cutting the ball off, quite often, although not all the time. I am not getting a large ball.


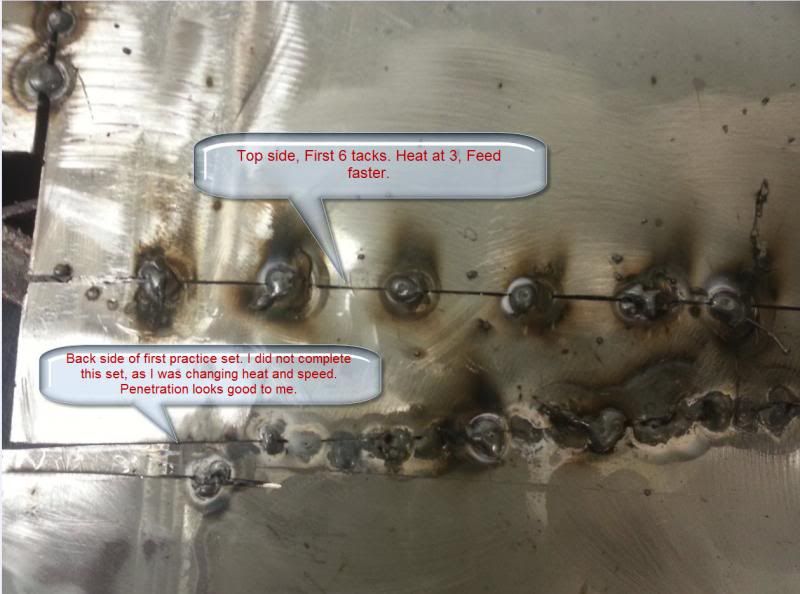
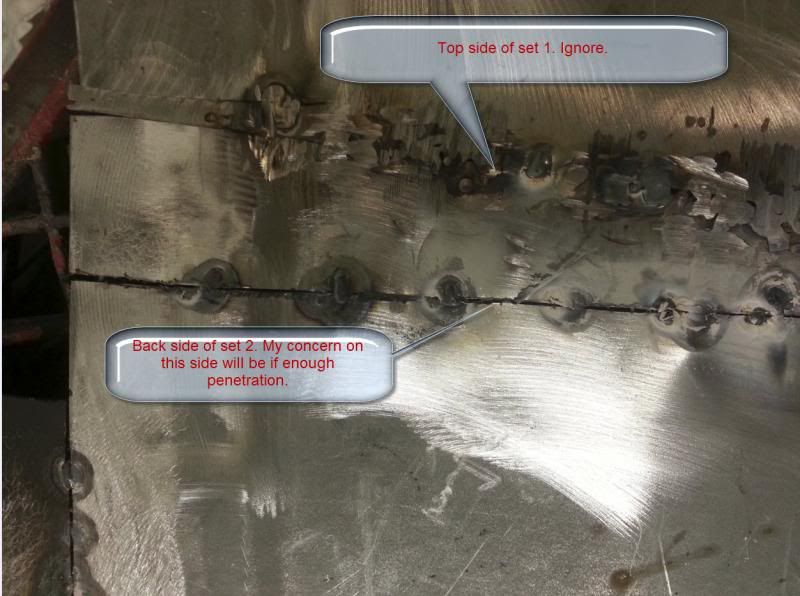
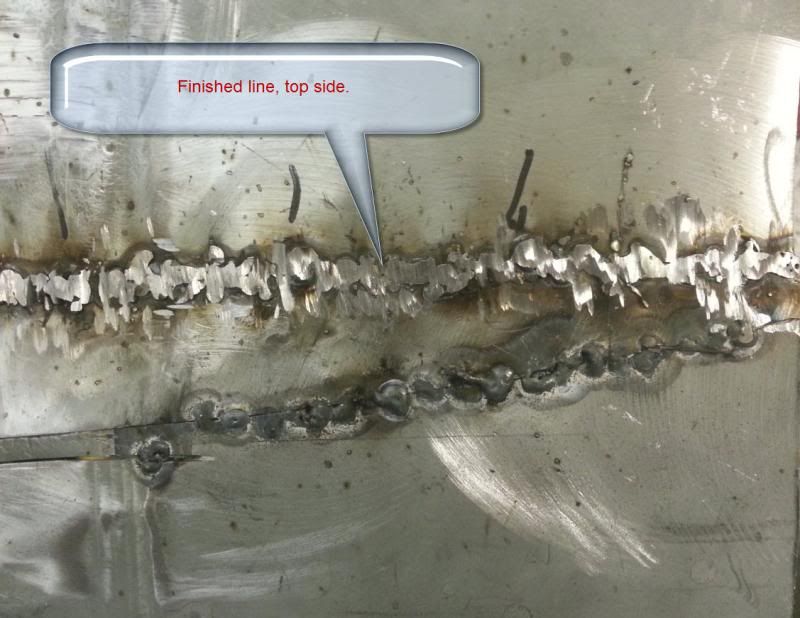
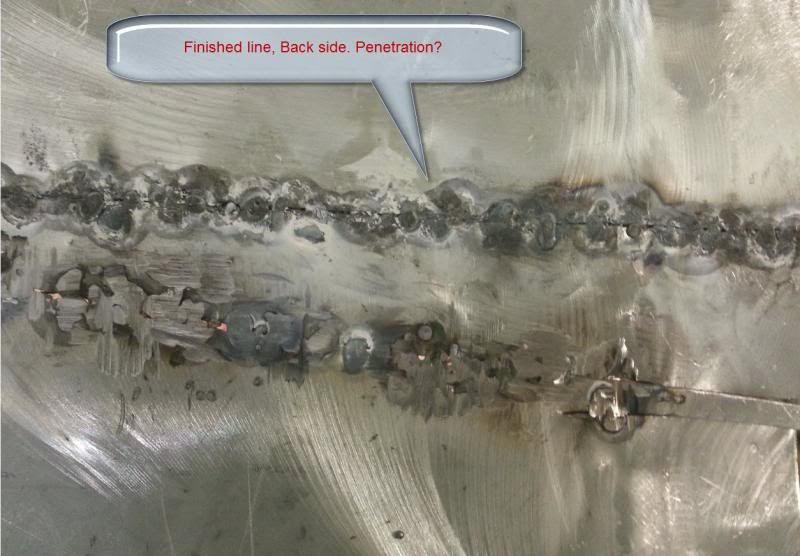
I'm posting pics below of my last test today. I did use 3 heat, and I turned up the feed speed a bit. I did not blow any holes through. As well, the complete weld line I did does appear to have no pin holes when I hold it up to the light. I'm by no means good at this, but I think I am improving.


I thought I took more pictures, but I guess most were on set 1. One of my main concerns at this point is the penetration, as seen on back side, good enough.


I'm going to stop practice for tonight. I plan to do one more practice, but with some gap in the pieces. I don't have confidence that for that entire scoop I can make it an exact fit. But I sure plan to give it a try.
 

56_Kruiser

New member
Making progress...

Well, I did a lot more practicing. While certainly not an expert, I think I'll get by. Appreciate your help.

Below is where I was at as of 5:00 p.m. CST yesterday. (Spent a lot of time trying to make the fit good...I'm pretty happy with the fit). You'll notice I had to cut a relief in the top of the scoop at the front to get it to fit down.


chopolds

Member
Good luck..you're going to need it on those flat areas! Just go very slow, take a LOT of breaks to cool down. Lots of tacks....
 
Top