Your recommendation for patch panel installation?

56_Kruiser

New member
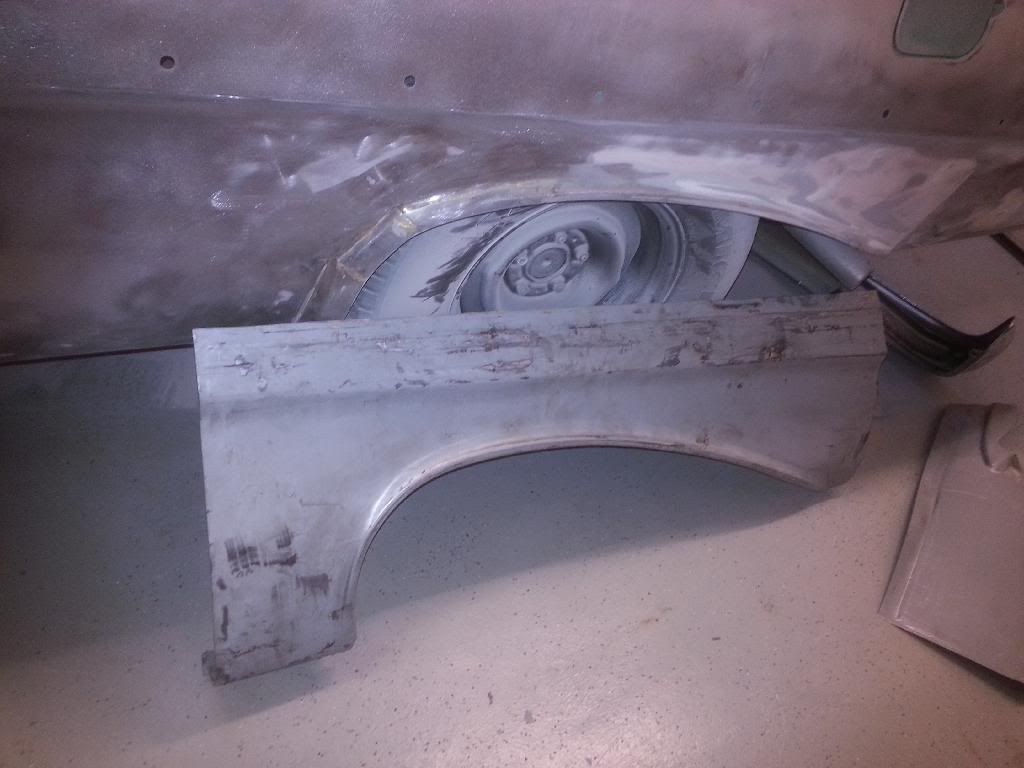
I have decided to put in a patch panel on my '61 Chevy Bubbletop rear quarters. The old patch there now was showing some failure. Below is the area, and the panel:


Been many years since I've done a patch panel (I'm not a professional body man). I'm thinking I'd like to butt weld it, using clamps similar to this.

My concern is in how to get the cut exact enough on the car to match the panel to. I plan to not use the entire panel. I plan to cut below the body line change (not sure how to best describe it...but you'll notice that the repair panel has is tall enough to be a couple inches above that line that runs from front to back down the side of the car. The curve on the patch panel is not very accurate .)

I'm thinking about cutting the patch panel to the size I want. Then lay it on the car and mark...but then cut it below the marking. that is, the patch panel would still overlay some metal on the car. Then get the patch panel clamped on the car, and use something to more precisely mark the outline of the patch panel, and then cut it out again, with expectations of fit.

Any thoughts and recommendations on anything about the process is apprecaited.

BTW...I have an old wire welder, with .030 wire, that I plan to weld it up with. Not sure I need to purchase a new welder, but open to comments and suggestions.

Thanks.
 
Last edited:

TAZ

Administrator
Staff member
I really can't help you on this one. I'm more of a painter. I've done smaller patches.
Not for sure if any other members can help you out on this.
 

chopolds

Member
I do rusty cars all the time, and have been at it for over 35 years. The article is OK except for a few things. Prep work is great. The part about using Clecos is probably unnecessary in your case, the panel is small enough to handle without extra holes. When trimming your patch panel, don't make any sharp 90* angles at the corners. When welding you are putting too much weld seam in a small area. Cut the patch with rounded edges, the rounder the better. Might be harder to do, esp. when making the matching cuts on the car body, but you get better welds, less warpage.
Do your tack just like they said. I like to hammer, on dolly, each tack as I go along, and also hammer on dolly the weld seam after it's all done, and the weld bead mostly ground down. You need to stretch the weld, as it will shrink the sheet metal and cause warps. Not a lot, but it takes a bit of experience to get it right. If your welds crack, then they didn't penetrate well enough and might give you problems down the line anyway. Be sure to weld it as hot as you can without blowing holes in the seam.

Next problem, not that you'll do it...is the "lead" part of filling the weld seam. Most folks do not use lead any more. After grinding/sanding, I wire brush any burnt residue in the welds, and grind lightly around the seam, then bodyfill. Finish as usual. I do NOT agree with his using a grinder or sander on any lead work. It makes lead dust, which can be inhaled, absorbed into the skin, or even eaten or drunk if there is food anywhere near your work area. Proper "cutting" of lead is done with a 'vixen' file, which leaves a nice smooth surface that doesn't need to be sanded or ground down. I rarely use lead, but when I do, I am very careful dealing with it. It needs to be properly 'tinned' before applying and then afterwards, the tinning flux is neutralized with baking soda and water paste before regular metal prepping, cleaning and primer.
 

56_Kruiser

New member
On the cut, here is what I have cut:


On dollying while getting 'er welded up, that may be difficult. There is a panel behind/inside, and so I don't think I'll be able to do that. I suppose I could cut it out and weld it back...not sure it's worth that type of effort.

I am not an experienced welder, although I have done quite a bit, long time ago, on my '56 when I did it. My welding is not pretty. So...I'm planning on doing the leading. I'm not confident I'll get a solid seam. Seems to me that leading will seal any pin holes.

I have seen some files used on lead on Youtube. Didn 't explain what they were. I just looked for a vixen file on Amazon, and they don't look like what I saw on Youtube. The ones on Youtube, had a file mounted to a wooden handle or something. Based on your suggestion, I'll plan on getting one. Does this at Amazon look like it'll work? Any particular length?

Again, Thanks for the input.
 

chopolds

Member
vixen_file1.jpg
This is one style, can be adjusted for a curved fender, concave, or convex. The wooden handled ones will work as well, avalable in half round, or flat. They even used to make curved ones, but they are VERY hard to find. And you can even use the Amazon pictured ones, just harder to control with a regular file handle.
It is almost always worth cutting an inner panel to be able to hammer and dolly it out if the warpage is significant. Much better than loading it up with too much filler, either lead or plastic. Welding the inner panel in doesn't need to be as nice as the outside. Besides, you can clean and seal the weld seam if you can get to it better with the inner cut out.
Try to eliminate ALL pinholes, even with lead, the water will get in the pinhole, and rust the steel behind the lead, causing it to bubble off. I like to seal up any welds on the backsides with POR-15 or other rust preventative, just to be safe.
 

56_Kruiser

New member
Ok. I'll probably take your suggestion.

I plan on using Por-15 for a number of areas on the car. Hadn't thought about the back of the weld. Good idea.

I'll do more searching for the file.
 

56_Kruiser

New member
I pulled out my welder today. If is an old Linde 160 mig welder. I'm a bit confused by what I'm seeing though. It has .023 wire in it. The Welder manual indicates it ships with .023. But the torch manual says the torch is for .030.

It was sold as an 'automotive body panel welder'. Maybe they put a linder in the torch for .023 wire. The liner in this thing is broken (although I've been able to use it, in the past). I'm going to try to see if I can find a new liner for the torch for .023 wire, or a new torch to work with the welder.

The argon tank on it I've had since I got the welder in 1983. I bet I run into problems getting it refilled, if I don't have enough gas in it.

So, I need to resolve this before I get to actually start practice and get panels (and hood scoops) put on.
 

chopolds

Member
The liner should be the same for .023, .030 and .035. Just the tips need to match the wire diameter. (though some machines have different rollers inside the machine for different dia. wires...mine uses the same roller for .023 and .030) .023 is a much better choice for welding sheet metal, if you can find a wire called E-Z Grind, that is a bit better, as well. Not really a must, but helps a bit.
Your welder should do the job just fine, probably much better than a new, cheaper welder...they dont' have the fine adjustments to make welding thin stuff easy.
 
Top