Hotrodder from Texas

tomls5

New member
Just signed up the other day and have been searching a lot of posts. Old cars are my sickness and since I cannot afford to pay to have them built, I do it myself. I am decent at BC/CC and have done 3 complete cars and several pieces.

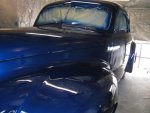
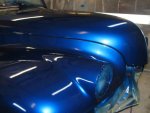
My current project is a 1940 Olds coupe and I have completed the initail Base color and cleared it. I had a friend who is a pinstriper come lay out flame patterns on the hood and fenders in fineline (I have no artistic talent). In the next few days I will shoot the pearl for the ghost flames. That is what I have been researching on this site. Still shooting test panels at the moment. First test panel was with PPG radiance crystal silver pearl but the result had too much glitter effect for what I was looking for. This evening I will try a couple with a frost blue pearl and a fine white to see how they look.

A couple of pics of the car in my homemade booth. Thanks for the information.

Steve
 

Attachments

  • paintpic2.jpg
    paintpic2.jpg
    40.1 KB · Views: 7
  • paintpic1.jpg
    paintpic1.jpg
    35.4 KB · Views: 10

bondofreak

New member
Looks good from here! WELCOME!
You obviously know this from your cool pics but keep in mind when painting pearls and metallics it is best to paint everything at once as it will be installed. For example don't hang a hood from the ceiling or a door flat on a stand.
 

tomls5

New member
Yes, panel painting does not work so well with pearls and metallics so I trimmed out the doors, fenders, hood, firewall etc, assembled the car and then shot the exterior. Did learn a lesson though that might help someone else. I did not catalyze the base coat (PPG DBC) and had a couple of spots where the trimmed out areas lifted right at the edge when covered with fresh basecoat. Had not run into that one before with DBC and after some research it appears that most folks are adding the DX hardener to the basecoat. Once catalyzed the base can be repaired without lifting (say if you sanded through the clear and had to spot an area). Fortunately I caught it quick and was able to repair it but lesson learned!
 

TAZ

Administrator
Staff member
Welcome to the Custom Paint Forum! Looks like a nice '40 you're working on!
 

bondofreak

New member
Next time you cut through clear.... You can mix a little of your clear catylized maybe an ounce or two then reduce it 100% shoot one wet coat on the cut through area then let flash real good. After that start your blend. Neat huh? It works just don't go crazy and run it cause it will be thin. I rarely ever catylize base but its fine to me either way.
 
Last edited:

tomls5

New member
Next time you cut through clear.... You can mix a little of your clear catylized maybe an ounce or two then reduce it 100% shoot one wet coat on the cut through area then let flash real good. After that start your blend. Neat huh? It works just don't go crazy and run it cause it will be thin. I rarely ever catylize base but its fine to me either way.

Thats how I ended up fixing the few areas I had problems with. I would think for you guys that work in multiple layers for graphics and midcoats etc. that the catalyzed base would be a must. For me , I will probably do it next go around just to eliminate the possibility. Thanks for the warm welcome!
 
Top