Blow Out

BeoBob

New member
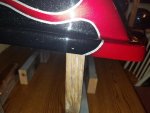
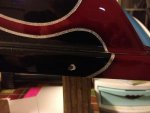
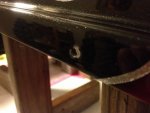
So I ran into a little problem last night on final assembly. One of the rivets pulled the pin all the way through instead of popping off. Enlarged the hole from a tight 1/8 to maybe 5/32 to 3/16 and deformed the surface a bit right around the hole. Then I totally screwed the paint when I SOOOOO carefully pushed the rivet out. Blew out a good chunk all the way down to the glass. Rivet head only covers half the damage. So whatever I do the repair will be visible all the way around the rivet.

How do I go about fixing this. JB weld? Fiberglass resin? Just layer epoxy primer until the build is the same level as the rest?

I have half a mind to fill the entire hole with JB weld and then float a toothpick off in the center of the hole (for the drill bit to follow later). Drill the new hole, carefully sand flat and feather out a little, spray a little black epoxy with the airbrush, sand and feather just a tad, light coat of black BC with the airbrush, couple of coats of clear with the airbrush, then cut with 1200/2000 and buff by hand.
A.jpgB.jpg
 

chopolds

Member
Good plan with the paint touch up. I'd use a mix of resin + finely chopped fiberglass to repair it, instead of JB Weld. Or maybe even use epoxy resin instead of poly resin. Stronger and sticks better. You can also buy special washers for the popular rivet sizes, to cover minor damage, and spread the load out on stressed pieces, or oversized holes.
 

TAZ

Administrator
Staff member
What I'd do is go ahead pretty much what you mentioned. shove some jb weld into the hole. Skim coat it with bondo, smooth it out prime it.
You'll want to keep this area 'fairly' small
Then sand that lip with 1000 grit. Probably go about 4" to the left of it (in the pic)
Mask it off at the edge of the flame*
Mask it off the rest of the edge - but put a 1/8" fine line right at the top edge of the lip - DO THIS LAST
Carefully dust some black on the smoothed out hole
Clear it - put a couple coats on
Then over-reduce the clear and blend it to the left - you won't have to to the right since the edge will be butted up against the flame edge
Now quickly pull off that 1/8" that you put on last in the above step

Once the paint is dry, you can redrill the hole

Use that corner directly above the hole. Put your tape on the TOPSIDE of the flat edge, about 1/16" from the front. This will give you a good buffer area to buff off.
DON"T go to the inside corner. This will be very difficult to buff if needed.

* You can also tape close to the edge of the flame, and add a 1/8" fine line like you did on the corner.
If you do this, you can pull this off the same time you pull the 1/8" off on the corner
So once you are immediately done painting and pull the 1/8" off, you'll still have the remaining masking you did.
Doing it this way will let the clear 'roll' and will not leave a hard edge. You can slightly wetsand and buff it if needed

Another tip is go ahead and slightly over-reduce the clear that you will be using to clear the area.
Then over-reduce this even more when you are blending it. This keeps the edges and thickness to a minimum.
 

TAZ

Administrator
Staff member
The fiberglass idea is even better since the lid is also probably made of fiberglass. Good idea ChopOlds
 

RobS

New member
The rivet pulled through....Oh crap...there's some soft glass in that spot.. maybe check to see how far that "sponge" stuff goes. It makes the job a lot bigger but do it right the first time and you only do it once.
 

BeoBob

New member
Don't think the glass was soft. Rivet pulled past a backup washer first, then through the fiberglass. It's all fixed now. Cleaned out all the damage. Filled using JB Weld mixed with finely chopped fiberglass. Then layered epoxy using a toothpick. Sand, epoxy, sand epoxy, sand..... until area was flat. Used the airbrush to spray black, sparkle, and clear. Cut, buff, done.

There is a slight halo in the right light, from the right angle where the new clear meets the old. But you can't see it unless you are really looking for it.

C.jpg
 
Top